M2 MacBook AirでStable Diffusionをローカル実行する
流行りの画像生成AI, Stable Diffusion をローカルで実行してみる。手元の環境はM2 MacBook Air。通常、AIの実行にはnVidiaのGPUが業界標準となっているが、Stable DiffusionはMacのGPU(MPS)へのポートが進められており、MacでもGPUを使って実行できる。
手元の環境は M2 MacBook Air, 24GB Memory, 8-core GPU(10ではない)
準備
いろいろインストール。anaconda, rust, protobuf, cmakeなどが必要となる。
$ brew install anaconda
anaconda をインストールしたあとはパスを通しておく。
$ export PATH="/opt/homebrew/anaconda3/bin:$PATH"
$ /opt/homebrew/anaconda3/bin/conda init zsh
としても良いが ~/.zshrcを書き換えられるので注意。
手順
本家ではなく、移植を行っているグループのapple-mps-supportブランチからクローンして、そのとおりにやれば動く。
https://github.com/magnusviri/stable-diffusion/blob/apple-mps-support/README-Mac-MPS.md
また、こちらからアカウントを作成して、ウェイトファイルをダウンロードする。合計12GBぐらい。
https://huggingface.co/CompVis/stable-diffusion-v-1-4-original
まずは、ソースコードをクローンする。
$ git clone -b apple-mps-support https://github.com/magnusviri/stable-diffusion.git

$ cd stable-diffusion
モデルをコピーする。
$ mkdir -p models/ldm/stable-diffusion-v1

$ mv ~/Downloads/sd-v1-4* models/ldm/stable-diffusion-v1

$ cd models/ldm/stable-diffusion-v1

$ ls -al
total 23432000
drwxr-xr-x   4 xxxx  xxxxx         128 Sep 17 13:11 ./
drwxr-xr-x  14 xxxx  xxxxx         448 Sep 17 13:10 ../
-rw-r--r--@  1 xxxx  xxxxx  7703807346 Sep 17 13:05 sd-v1-4-full-ema.ckpt
-rw-r--r--@  1 xxxx  xxxxx  4265380512 Sep 17 12:53 sd-v1-4.ckpt

$ ln -s sd-v1-4-full-ema.ckpt model.ckpt

$ cd ../../..
condaで環境を作成して、アクティベートする。
$ CONDA_SUBDIR=osx-arm64 conda env create -f environment-mac.yaml

$ conda activate ldm
モデルをプリロードして実行する。
scripts/dream.pyは対話プロンプトを表示するので、そこに「呪文」を唱えると画像が錬成される。
$ python scripts/preload_models.py

$ python scripts/dream.py --full_precision
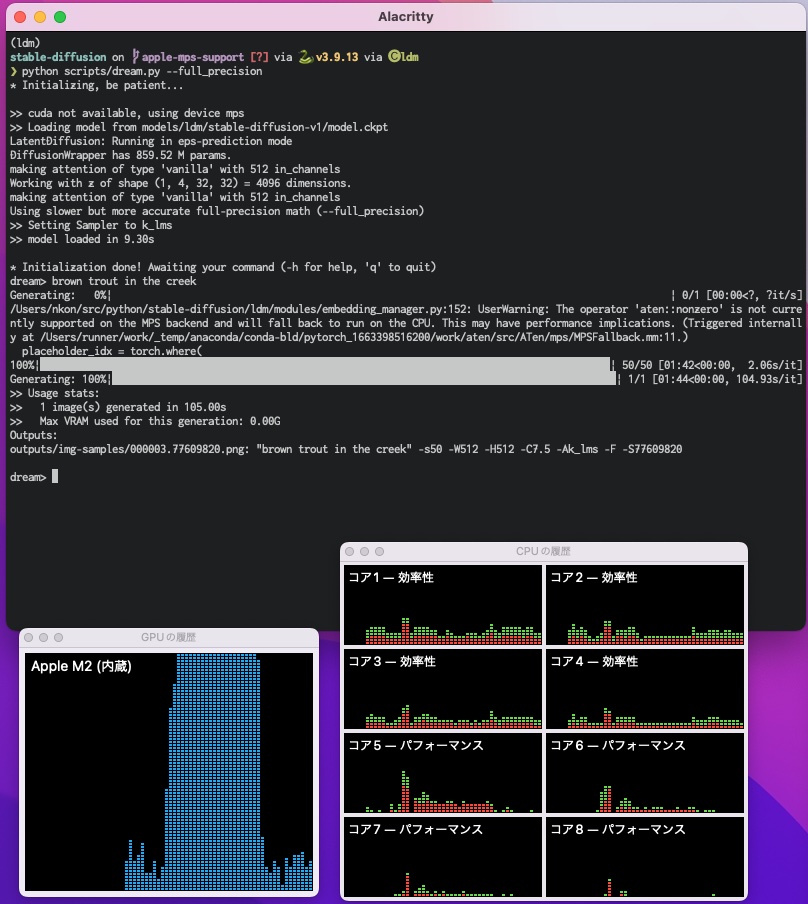
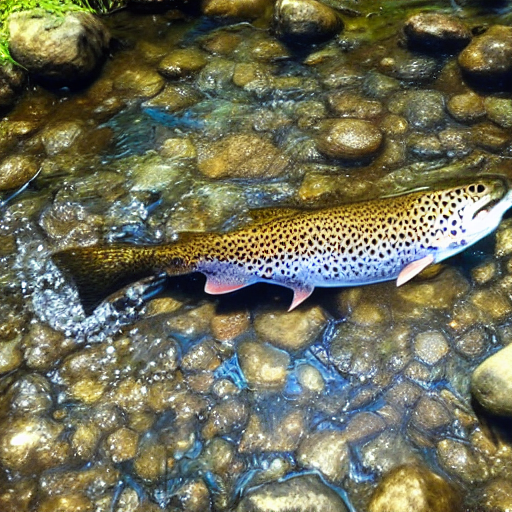
“brown trout in the creek” という呪文を唱えたら1枚を1m44sで錬成。
上の実行結果からすると、GPUをフルに活用しているようだ。